
A properly prepared cover is a guarantee of high-quality printing and a neat appearance of the finished book. When creating a layout, it is important to consider the type of cover, trim parameters, folds, spine, and technical requirements of the printing house. In this article, we will analyze how to prepare a cover for soft and hardcover to avoid mistakes and get a flawless result.
Paperback: How to Prepare a Layout
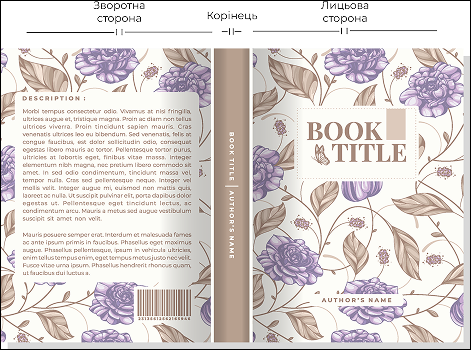
A softcover consists of three parts: - front side + spine + back side, combined into one continuous layout. Basic preparation rules:
- The cover should be in one file, without being divided into parts.
- Bleed margins and crop marks are not added — the printer adds them on its own.
- File format:
- PDF is the best option because it preserves high quality and correctly transmits colors.
- You can send JPEG, PNG, tiff, but the quality is often lower. - The image quality is 300 ppi. This ensures the clarity of small elements and texts.
- Color profile: CMYK (for correct printing without color shift)
Original size for paperback
Original size for paperback
For paperbacks, formats from A6 to A4 are available, as well as a square format with a maximum size of 20×20 cm. You can choose a standard format or create your own, depending on the design and purpose of the publication.
Usually, the original format of a paperback cover is calculated taking into account the size of the block and the thickness of the spine, since the cover covers both the front and back pages of the book.
Calculation formula:
- Cover width = block width + spine width + block width
- Cover height = block height
That is, the total width of the layout consists of two page widths (front and back) and the spine between them, and the height is equal to the height of the inner block.
Hardcover: What to Consider When Creating a Layout
Hardcover requires greater precision during preparation, as a cardboard plate, fold, and compensation indents are added to the cover.
Main requirements
The layout is created according to the scheme provided by the printing house:
- There is no need to add folds - the printing house takes them into account in the technical drawing.
- Important point:
- from the spine, 8 mm on each side go into the spacing, that is, when creating a design:
- subtract 8 mm from the cover side,
- and 8 mm from the back side, so that the picture is perfectly centered. - Safe zones. All important elements (text, logos, thin lines) should be 10–15 mm indented from the edge of the slab. This prevents unsightly design elements from falling onto the fold when the layout is mirrored.
The spine thickness for a thread-bound book may differ from the calculated value, since the actual thickness of the book block is determined after it has been produced. By default, the spine layout is scaled according to the actual dimensions of the finished book block.
Original hardcover size
For hardcover books, the cover size is calculated using a single formula, taking into account the technological allowances necessary to produce a high-quality and neat cover.
Here everything is calculated according to a single formula:
Cover width = (block width – 2 mm) + 8 mm + spine + 8 mm + (block width – 2 mm)
Cover height = block height + 6 mm
Explanation:
- The cover is 2 mm smaller than the block in width on each side.
- +8 mm on the left and +8 mm on the right — compensation for spacing.
- +6 mm to the height is a technological allowance for hardcover.
Important advice on choosing lamination
When ordering matte lamination for books with dark backgrounds, you need to consider:
- On dark colors, matte lamination can give the effect of scuffing or "stains" with active use.
- If the cover is dark (black, dark blue, burgundy), sometimes it is better to choose glossy, if the design allows. This will help maintain a neat appearance of the cover for a longer time.
- We do not recommend making dark covers, since digital printing and lamination have a less stable adhesion, etc.
Final recommendations for the perfect cover
- Use CMYK, not RGB.
Don't put important text close to the edges. - Check the spine - its thickness depends on the number of pages and paper.
- Save the final file as PDF/X-1a or PDF/X-3 — this is the standard for printing.
- Make sure the fonts are embedded or rasterized.
- Be sure to view the file at 100% scale before sending.